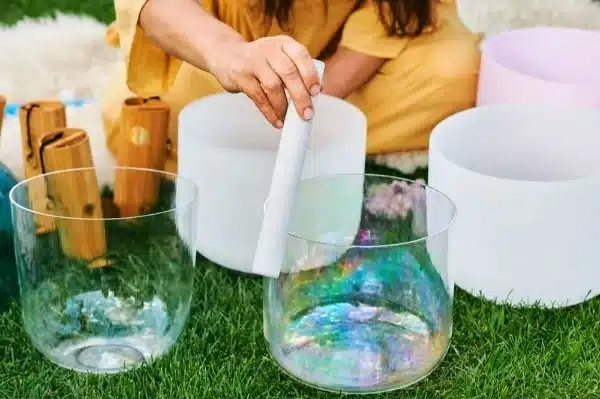
Do you have an old crystal singing bowl that no longer works? It’s disheartening when something we hold dear seems to be lost forever.
But did you know that it is possible to restore your beloved crystal singing bowl to its original condition? You can bring your beautiful crystal singing bowl back to its former glory with the proper instructions and materials.
In this article, we’ll explain how to restore a broken crystal singing bowl to function like brand new and produce a sound similar to its original.
Why Repair a Broken Crystal Singing Bowl?
Here are several reasons someone may want to restore a broken crystal singing bowl:
- Restore the bowl to its original beauty and function.
- Preserve the sentimental value of the bowl.
- Create a sense of accomplishment and satisfaction from completing a restoration project.
- Avoid the cost of purchasing a new bowl.
- Valuable and worth the investment in repair.
Overall, there are many reasons why someone may want to restore a broken crystal singing bowl.
Here’s a video that shows what singing bowls can do:

Assessing the Damage
To assess the damage of a broken crystal singing bowl, follow these steps:
- Collect all the broken pieces and gently clean them to remove any dirt or debris.
- Inspect each piece for cracks, chips, or other damage.
- Check for signs of corrosion, flaking, or discoloration on the surface.
- Measure the size and depth of any bowl cracks or gaps in the bowl using a ruler or calipers.
- Determine if the bowl is structurally sound by gently tapping it with a mallet and listening for vibrational tones. It might be too late to fix the bowl if it doesn’t create a clear tone.
- Consider the overall condition of the bowl and whether it is feasible to repair it.
By following these steps, you can assess the damage of a broken crystal singing bowl and decide if you can restore it.
Evaluating the Cost and Feasibility of Repairing a Broken Bowl
When a crystal singing bowl becomes broken, it is essential to assess the extent of the damage before deciding whether or not to repair it. There are a few key factors to consider when evaluating the cost and feasibility of restoring a broken bowl:
- The extent of the damage: How severe is the damage to the bowl? If the bowl is severely damaged, it may not be worth the cost to repair it.
- The value of the bowl: Is it worth repairing based on its sentimental or monetary value? If the bowl is a rare or valuable antique, it may be worth the cost to fix it.
- The cost of repair: What will it cost to repair the bowl? Is the repair cost worth the investment, or would it be better to invest in a new bowl?
- The availability of repair resources: Are there skilled professionals and resources available to repair the bowl?
Considering these factors, you can determine whether repairing the broken crystal bowl is worth the investment. However, it is critical to consider the advantages and disadvantages before making a choice.
Gather the Tools and Materials
It is crucial to gather all the necessary tools and materials for restoring a broken crystal singing bowl before starting the repair process,
- Epoxy resin is a strong adhesive you can use to repair cracks and chips in the bowl.
- You can use fiberglass mesh and epoxy resin to reinforce and strengthen the repair.
- You can also use sandpaper to smooth out sharp edges and prepare a surface for repair.
- While the epoxy resin dries, you can use clamps to hold the fiberglass mesh in place.
- Before applying the epoxy resin, you can wipe the bowl’s surface with acetone.
- You can use mixing cups and sticks to mix the epoxy resin and fiberglass mesh.
- To check the repair, lightly tap the bowl with a mallet.
- Use calipers or a ruler to gauge the bowl’s size and measurements.
- Protective gloves will help to protect your hands from cuts and abrasions. In contrast, goggles will protect your eyes from any potential flying shards of crystal.
- Clean rags or paper towels can help wipe away any dirt, dust, or debris that may have accumulated.
- A ventilation mask (if working with epoxy resin) is worn over the mouth and nose to protect the wearer from inhaling potentially harmful substances, such as dust, chemicals, and fumes.
Note: This list is not exhaustive and may vary depending on your specific repair process. You can consult a professional or refer to a repair guide for a complete list of tools and materials needed.
Step-by-Step Instructions for Repairing the Bowl Using Epoxy or Superglue
Before starting any repairs, ensure the singing bowl is cleaned and dried and that you have all the necessary materials. Gather the necessary tools and materials. You will need epoxy or super glue, sandpaper, a glass cutter or diamond drill bit (optional), a fine-toothed file, and felt pads or rubber feet (optional).
Here is a step-by-step guide for fixing a damaged crystal singing bowl using either epoxy or super glue.
- Start the repair process by sanding the damaged area of the bowl using sandpaper. Begin with a coarse grit and gradually progress to a finer grit to create a smooth surface by removing rough edges.
- Cutting down rough edges with a glass cutter or diamond drill bit may be necessary if the bowl has a sizable crack or break. While using these tools, exercise the appropriate caution and adhere to the manufacturer’s recommendations.
- Applying epoxy or superglue is necessary once you prepare the bowl’s surface. Follow the instructions to mix and apply the adhesive properly. Use gloves to protect your skin from any chemicals.
- If the bowl has significant damage, applying multiple layers of epoxy or superglue may be necessary to ensure a proper seal. Ensure to let the previous one completely dry before applying the subsequent layers.
- After the epoxy or super glue is thoroughly dried, use a fine-toothed file to remove any rough edges or excess adhesive.
- If desired, you can add felt pads or rubber feet to the underside of the bowl to prevent it from slipping and protect it from scratches.
- Finally, give the bowl a thorough cleaning, and it is ready to use once again! Restoring a broken crystal singing bowl to its original beauty and function is possible with care and patience.
The process may require time and patience, but you can bring the singing bowl back to its original condition with the proper materials and knowledge.
Tips for smoothing out any rough edges or imperfections
After you have repaired a broken crystal singing bowl, it is crucial to smooth out any rough edges or imperfections to restore its beauty and functionality. Here are a few tips to help you achieve a smooth, polished finish:
- Sand the edges: Using fine-grit sandpaper, gently sand the edges of the repaired bowl in a circular motion. Start with a coarse grit and then move to a finer grit for a smoother finish.
- Use a polishing compound: Apply a small amount of polishing compound to a soft cloth and gently rub it onto the edges of the bowl.
- Buff the edges: Using a soft cloth or buffing pad, buff the edges of the bowl in a circular motion. Removing any remaining roughness will give the bowl a smooth and glossy finish.
- Use a Dremel tool: If you still have trouble smoothing out the edges, consider using a Dremel tool with a sanding or polishing attachment.
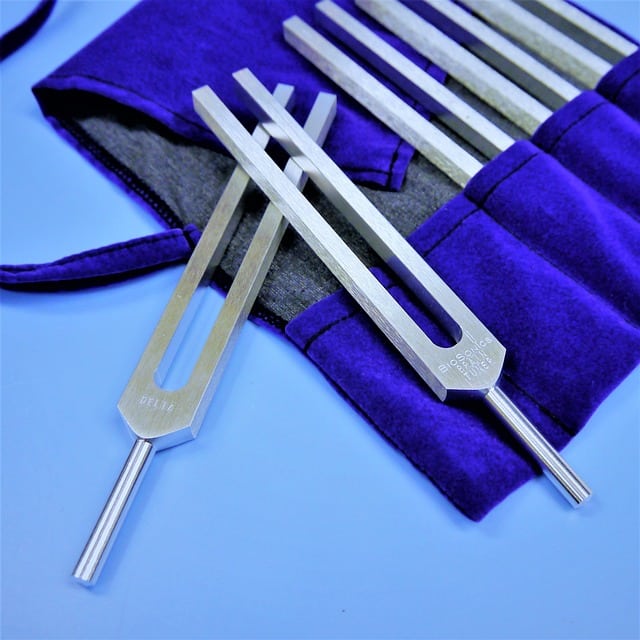
Tuning and Testing for Resonance
Tuning a crystal singing bowl involves using a tuning fork and mallet to match the sound of the bowl to its intended note. First, use the tuning fork as a guide. Then, use the mallet to tap the sides of the bowl until you hear the desired tone.
Throughout the procedure, it’s crucial to be patient and take your time. Make sure to seek help from an expert to ensure the best results.
To test for resonance in a crystal singing bowl, gently strike the bowl with a mallet and listen for any vibrational tones. The sound produced should be clear and robust. It is likely beyond repair if the bowl does not retain those qualities.
Finishing Touches
After restoring a broken crystal singing bowl, it is vital to make sure it plays the way you want it to. You can do it by testing the bowl and ensuring it plays correctly, checking the gap size, and using the suitable mallet.
These finishing touches will help to ensure that your restored bowl produces beautiful, soothing sounds.
Optional:
Add felt pads or rubber feet to the bottom of the bowl to protect it from further damage. Adding decorative elements such as etching or painting can also enhance its aesthetic appeal.
Final thoughts
In conclusion, restoring a broken crystal singing bowl requires careful handling, preparation, and the right tools. However, when done correctly, the repaired crystal singing bowl can be a powerful instrument for healing and a beautiful symbol of transformation.
In the end, the experience of restoring the bowl should be a source of satisfaction and pride. However, if fixing the crystal singing bowl is too complex or challenging, seeking help from an expert is recommended.
No matter what, it’s important to remember that crystals naturally age over time. Taking the necessary steps now will ensure that your crystal singing bowl will continue to bring you joy for years to come!