Are you looking for creative ways to relieve stress and relax? Look no further! In this article, you will discover incredible stress balls diy techniques. These incredible techniques not only provide a fun and engaging activity, but they also offer a therapeutic outlet for releasing tension and promoting relaxation. Whether you’re a DIY enthusiast or simply curious about trying something new, these stress ball techniques will surely captivate your interest. So, roll up your sleeves and get ready to discover the amazing world of stress ball DIY techniques. Let’s get started!

Discover Incredible Stress Balls Diy Techniques: Benefits of DIY Stress Balls
Understanding stress and the role of stress balls
Stress is a common part of our daily lives, and finding effective ways to manage it is important for our overall well-being. Stress balls have gained popularity as a simple yet effective tool for stress relief. The repetitive squeezing and releasing motion can help to relax your muscles and reduce tension. DIY stress balls take this concept a step further by allowing you to create your own personalized stress relief tool.
A fun and creative activity
Making your own stress ball can be a fun and creative activity that provides a sense of accomplishment. It allows you to express your creativity while also serving as a therapeutic outlet. Engaging in activities like these can help to distract your mind from stressors and promote relaxation.
Customizable to individual needs
One of the biggest advantages of DIY stress balls is that they can be customized to your individual needs. Whether you prefer a soft or firm stress ball, you can choose the filling material accordingly. Additionally, you can experiment with different textures, colors, and designs to create a stress ball that suits your preferences and personality.
Cost-effective stress management strategy
Purchasing stress balls from retail stores can be expensive, especially if you need multiple stress balls for different locations such as home, office, or gym. Making your own stress balls is a cost-effective alternative that allows you to save money while still benefiting from stress relief. The materials required for DIY stress balls are often readily available and affordable, making it an accessible stress management strategy.
Environment-friendly option
In today’s world, it is important to be mindful of our environmental impact. DIY stress balls offer an environment-friendly option compared to commercially produced stress balls. By using materials that are easily recyclable or biodegradable, you can contribute to reducing waste and minimizing your carbon footprint.
Materials Needed for DIY Stress Balls
Choosing the right balloon
The first step in making a DIY stress ball is to choose the right balloon. Balloons come in various sizes and materials, so it’s important to select one that suits your preferences. Latex balloons are commonly used for stress balls due to their stretchability and durability. However, if you have latex allergies, it’s best to opt for latex-free alternatives such as silicone or rubber balloons.
Various filling options
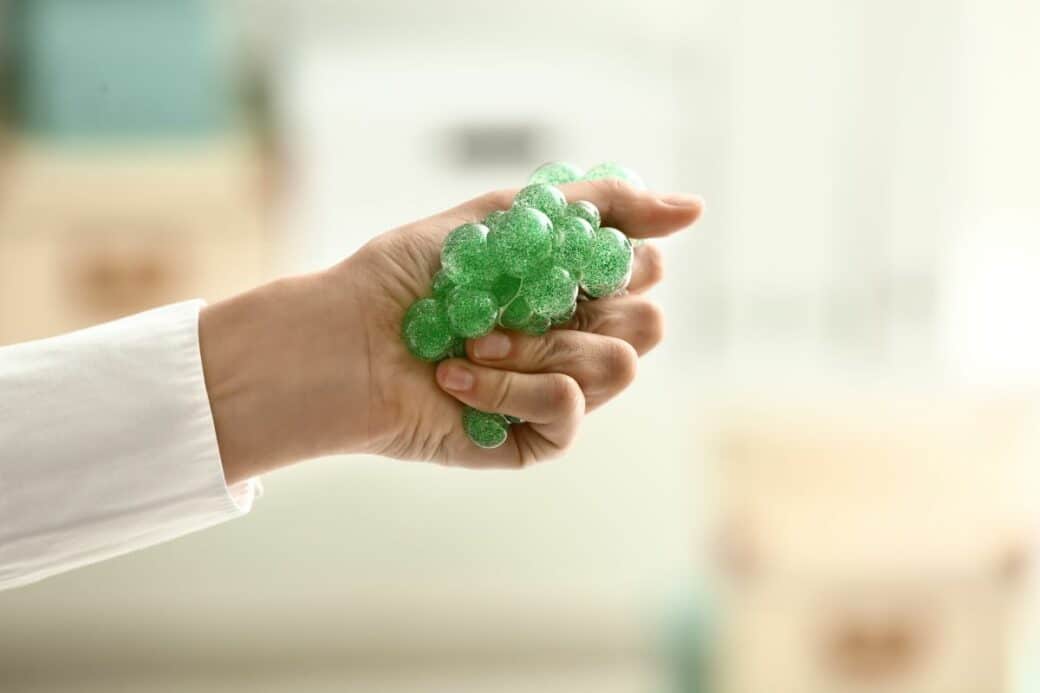
The filling material plays a crucial role in determining the texture and feel of your stress ball. There are various options to choose from, depending on your desired level of firmness and texture. Some popular filling materials include flour, rice, beads, sand, and gel. Each material offers different advantages and characteristics, allowing you to find the perfect filling for your stress ball.
Useful tools for the process
Although making a DIY stress ball is a relatively simple process, having a few tools on hand can make the process easier and more efficient. Some useful tools include a funnel to pour the filling material into the balloon, a measuring cup to ensure accuracy, and a spoon or scoop to handle the filling material. Having these tools readily available will streamline the process and ensure that your stress ball turns out just the way you want it.

Basic Technique for DIY Stress Balls
Blowing up the balloon
Start by stretching the balloon a few times to make it more pliable. Then, place the opening of the balloon over the tip of your pump or simply blow into it manually. Inflate the balloon to the desired size, making sure it is large enough to accommodate the filling material without bursting.
Filling the balloon
Once the balloon is inflated, it’s time to fill it with your chosen filling material. This is where a funnel comes in handy. Insert the funnel into the opening of the balloon and carefully pour the filling material into the balloon. Take your time to ensure an even distribution of the filling material, avoiding overfilling or underfilling.
Sealing it up
After filling the balloon, remove the funnel and let out any excess air. Hold the opening of the balloon tightly with one hand to prevent the filling material from escaping. Use your other hand to twist the neck of the balloon several times, creating a tight seal. Make sure to keep a firm grip on the twisted portion to maintain the seal.
Ensuring the durability of your stress ball
To ensure the longevity of your stress ball, it is important to reinforce the seal. This can be done by tying a knot at the twisted portion of the balloon. For added security, you can apply a small amount of glue or adhesive to the knot. Reinforcing the seal will prevent any accidental leakage and increase the durability of your stress ball.
Creating A Flour-filled Stress Ball
Material preparation
To make a flour-filled stress ball, you will need a latex balloon, all-purpose flour, a funnel, and a spoon or scoop.
Steps to follow
- Inflate the latex balloon to the desired size.
- Attach the funnel to the opening of the balloon.
- Slowly pour the flour into the balloon using the spoon or scoop.
- Gently tap or shake the balloon to distribute the flour evenly.
- Remove the funnel and let out any excess air.
- Twist the neck of the balloon and tie a knot to seal it.
- Apply a small amount of glue or adhesive to reinforce the knot.
- Your flour-filled stress ball is ready to use!
Tips for making a flour-filled stress ball
- Start with a small amount of flour and gradually add more as needed to achieve the desired firmness.
- Avoid overfilling the balloon with flour, as it may make the stress ball too hard.
- Experiment with different balloon sizes and amounts of flour to find the perfect balance for your stress ball.
Creating A Rice-filled Stress Ball
Material preparation
To make a rice-filled stress ball, you will need a latex balloon, uncooked rice, a funnel, and a spoon or scoop.
Steps to follow
- Inflate the latex balloon to the desired size.
- Attach the funnel to the opening of the balloon.
- Slowly pour the uncooked rice into the balloon using a spoon or scoop.
- Gently tap or shake the balloon to distribute the rice evenly.
- Remove the funnel and let out any excess air.
- Twist the neck of the balloon and tie a knot to seal it.
- Apply a small amount of glue or adhesive to reinforce the knot.
- Your rice-filled stress ball is now ready for use!
Advantages of a rice-filled stress ball
- Rice provides a slightly firmer texture compared to flour, which may be preferred by individuals who prefer a more substantial grip.
- The weight of the rice adds an extra sensory element, providing a soothing effect when squeezing the stress ball.
- Rice-filled stress balls can be heated in the microwave for a few seconds to provide warmth, making them ideal for relieving muscle tension.
Creating A Bead-filled Stress Ball
Material preparation
To make a bead-filled stress ball, you will need a latex balloon, small plastic beads, a funnel, and a spoon or scoop.
Steps to follow
- Inflate the latex balloon to the desired size.
- Attach the funnel to the opening of the balloon.
- Slowly pour the small plastic beads into the balloon using the spoon or scoop.
- Gently tap or shake the balloon to distribute the beads evenly.
- Remove the funnel and let out any excess air.
- Twist the neck of the balloon and tie a knot to seal it.
- Apply a small amount of glue or adhesive to reinforce the knot.
- Your bead-filled stress ball is now ready for use!
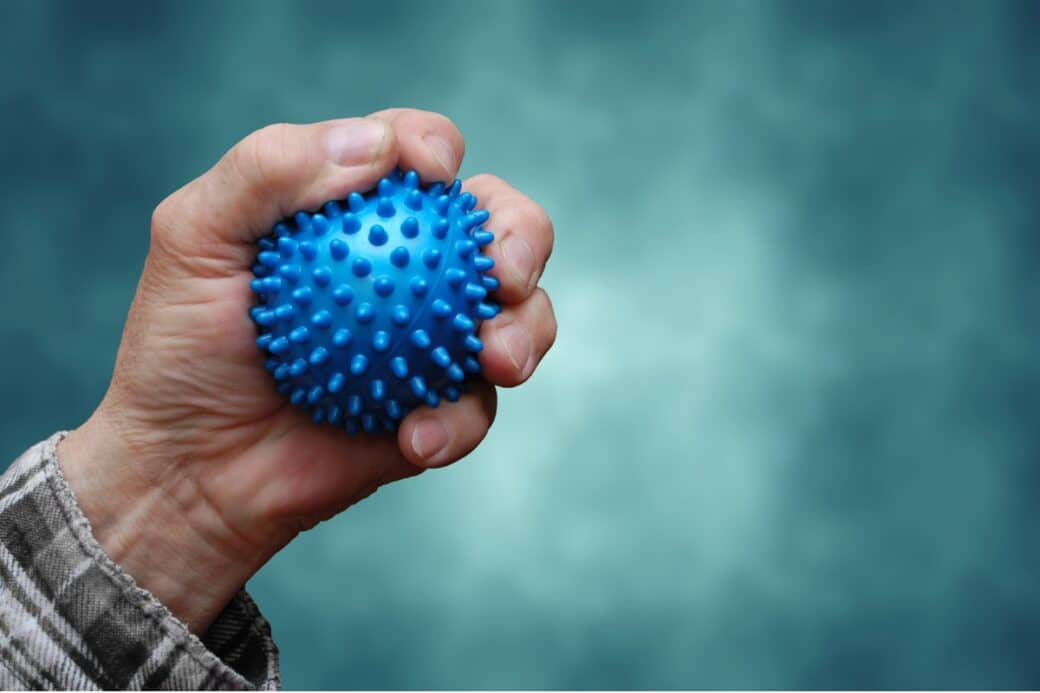
Why choose beads as filling?
- Beads provide a unique texture that can enhance the sensory experience of using a stress ball.
- The firmness of beads allows for a more precise grip, making them suitable for targeting specific areas of tension.
- Bead-filled stress balls can produce a subtle, rhythmic sound when squeezed, adding an auditory element to the stress relief process.
Creating A Sand-filled Stress Ball
Material preparation
To make a sand-filled stress ball, you will need a latex balloon, fine sand, a funnel, and a spoon or scoop.
Steps to follow
- Inflate the latex balloon to the desired size.
- Attach the funnel to the opening of the balloon.
- Slowly pour the fine sand into the balloon using the spoon or scoop.
- Gently tap or shake the balloon to distribute the sand evenly.
- Remove the funnel and let out any excess air.
- Twist the neck of the balloon and tie a knot to seal it.
- Apply a small amount of glue or adhesive to reinforce the knot.
- Your sand-filled stress ball is now ready for use!
Benefits of a sand-filled stress ball
- Sand provides a unique tactile sensation that can enhance the stress-relieving experience.
- The weight and texture of the sand add a grounding element, promoting a sense of stability and calmness.
- Sand-filled stress balls can also be used as hand exercises, as squeezing the sand provides resistance and helps to strengthen the muscles in your hands.
Creating A Gel-filled Stress Ball
Material preparation
To make a gel-filled stress ball, you will need a latex balloon, clear gel or slime, a funnel, and a spoon or scoop.
Steps to follow
- Inflate the latex balloon to the desired size.
- Attach the funnel to the opening of the balloon.
- Slowly pour the clear gel or slime into the balloon using the spoon or scoop.
- Gently tap or shake the balloon to distribute the gel evenly.
- Remove the funnel and let out any excess air.
- Twist the neck of the balloon and tie a knot to seal it.
- Apply a small amount of glue or adhesive to reinforce the knot.
- Your gel-filled stress ball is now ready for use!
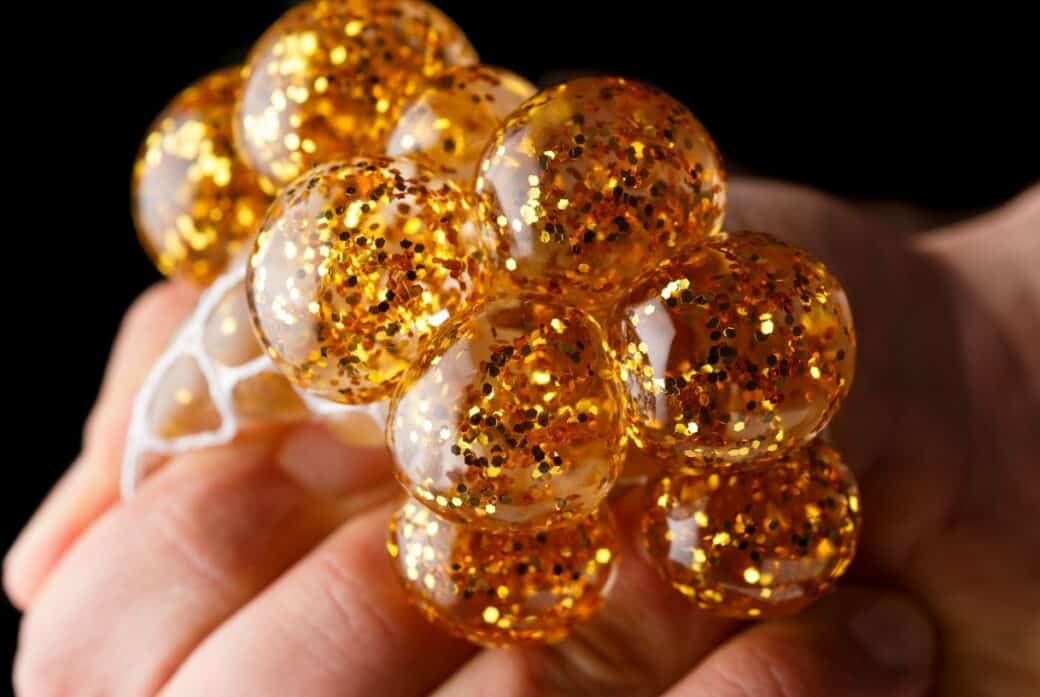
Pros of a gel-filled stress ball
- Gel-filled stress balls provide a unique squishy texture that can be satisfying to squeeze and manipulate.
- The gel conforms to the shape of your hand, making it comfortable to hold and providing a calming sensation.
- Gel-filled stress balls can be chilled in the refrigerator for a while to provide a cooling effect, making them ideal for soothing headaches or reducing inflammation.
Creative Ideas for Decorating Your Stress Ball
Using paints
Once you have created your DIY stress ball, you can personalize it by using paints. Acrylic paints work well on latex balloons and can be used to create colorful designs or patterns. You can let your imagination run wild and decorate your stress ball with vibrant colors or motivational quotes. Painting your stress ball adds an additional element of self-expression and makes it truly one-of-a-kind.
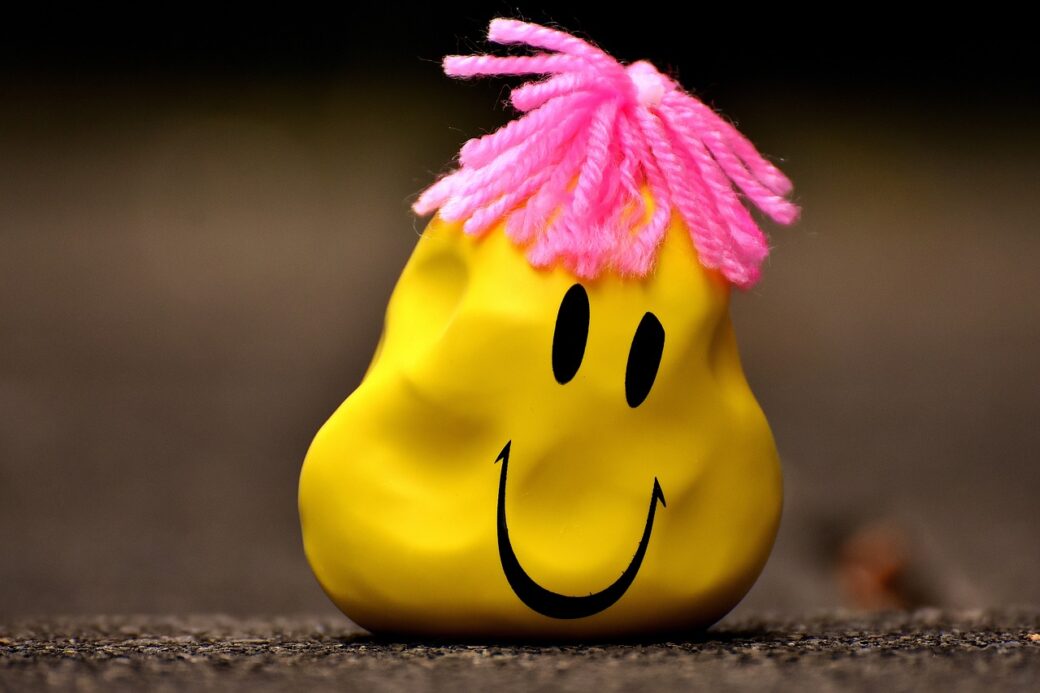
Adding fabric or yarn
Another creative way to decorate your stress ball is by adding fabric or yarn. You can cut out small fabric patches or wrap yarn around the stress ball to create unique textures. Using different fabrics and yarns can add visual interest and make your stress ball visually appealing. Additionally, fabric or yarn coverings provide a soft and tactile sensation when gripping the stress ball, enhancing the overall experience.
Decorating with markers
If you prefer a simpler approach, you can decorate your stress ball using markers. Sharpie or permanent markers work well on latex balloons and allow you to draw intricate designs or write inspiring messages. Decorating with markers gives you the freedom to personalize your stress ball quickly and easily. It’s a great option for those who prefer a more minimalistic style or want to create a stress ball with specific intentions or affirmations.
Maintenance and Care for DIY Stress Balls
Regular checking for leaks
To ensure the longevity of your DIY stress ball, it’s important to regularly check for leaks or tears. Over time, the stress ball may develop tiny holes or weak spots that can cause the filling material to leak out. To check for leaks, gently squeeze and manipulate the stress ball, feeling for any air escaping or changes in texture. If you notice a leak, you can apply a small amount of glue or adhesive to seal it or prepare to create a new stress ball if necessary.
Cleaning your stress ball
Like any object that comes in contact with your hands, stress balls can accumulate dirt and oils over time. To clean your DIY stress ball, start by wiping it with a damp cloth or sponge. For more thorough cleaning, you can use a mild soap or detergent and gently scrub the surface of the stress ball. Rinse it thoroughly with water and allow it to air dry before using it again. Regular cleaning helps to maintain the cleanliness and effectiveness of your stress ball.
Storage tips
When not in use, it’s important to store your DIY stress ball properly to ensure its longevity. Keep it in a cool and dry place, away from direct sunlight or extreme temperatures. Avoid storing it in areas where it can be easily punctured or damaged. If possible, store your stress ball in a container or a sealed bag to protect it from dust and debris. Proper storage will help to maintain the quality of your stress ball over time.
When and how to make a new one
If your DIY stress ball starts to lose its shape, firmness, or if the filling material becomes compromised, it may be time to make a new one. The lifespan of a stress ball can vary depending on the materials used and the frequency of use. If you notice any signs of wear and tear, such as thinning of the balloon or an unpleasant odor, it’s best to discard the stress ball and create a new one. Making a new stress ball allows you to customize it to your changing preferences and ensures that you continue to benefit from the stress-relieving properties.
Recycling old stress balls
When it’s time to say goodbye to your old stress ball, consider recycling it if possible. Most stress balls made from latex balloons can be recycled along with other latex products. Check with your local recycling center to see if they accept latex balloons or stress balls. Properly recycling your old stress balls helps to reduce waste and gives them a new lease on life.